
1. If you're not already there, head to go.per4mance.io or log into the Per4mance iPhone or Android app.
2. Click on "Settings" found on the top right of your dashboard. This can also be accessed via "Organizational Settings" in the three horizontal lines on the top left of the screen.
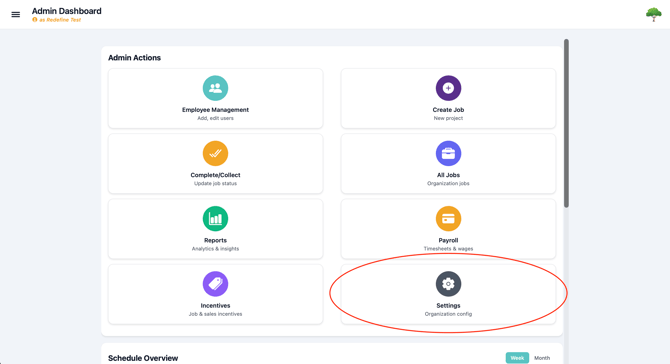
3. Scroll down until finding "Time Categories" and click the "Manage Time Categories" button.
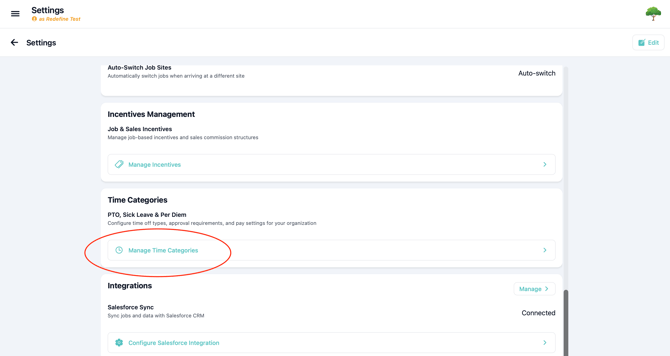
4. Click the "+" button on the top right of the screen.
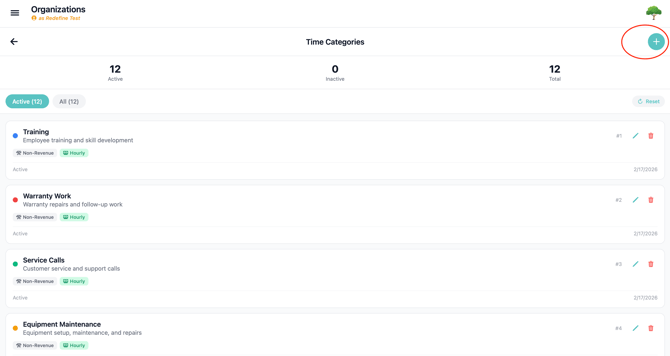
5. Fill out form with Category Name, Description (Optional), choose a Category Type.
Toggle if needed: Paid category, Requires approval, Counts toward overtime.
Click save to finish creating category.
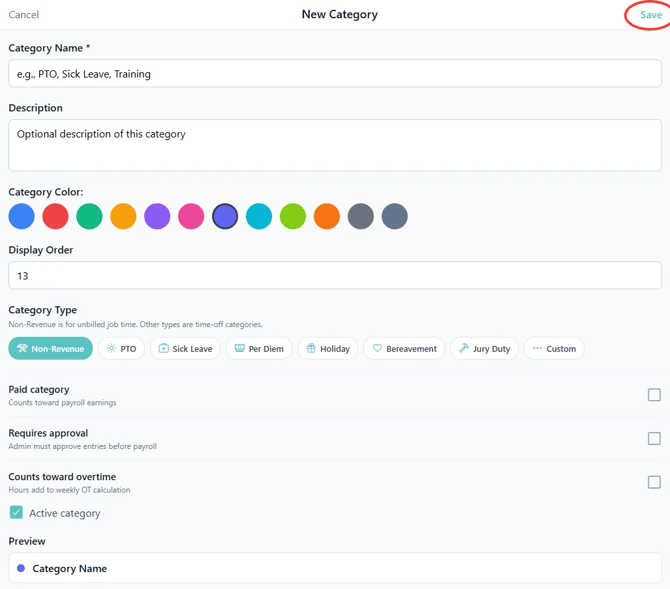
Non Revenue: Hours worked outside of a specific Job. Examples can be work truck maintenance, Office work, etc..
Time Off Categories/Benefit Time Off: Hours that are accumulated due to the employees time with the company, or otherwise entitled to by law. Examples can be PTO, Holidays, Sick Leave, etc..
7. To apply the Non-Revenue Category created go back to Dashboard. Click on "Payroll" found on the top right of your dashboard. This can also be accessed via "Payroll" in the three horizontal lines on the top left of the screen.
.png?width=670&height=540&name=dash.PNG-mh%20(4).png)
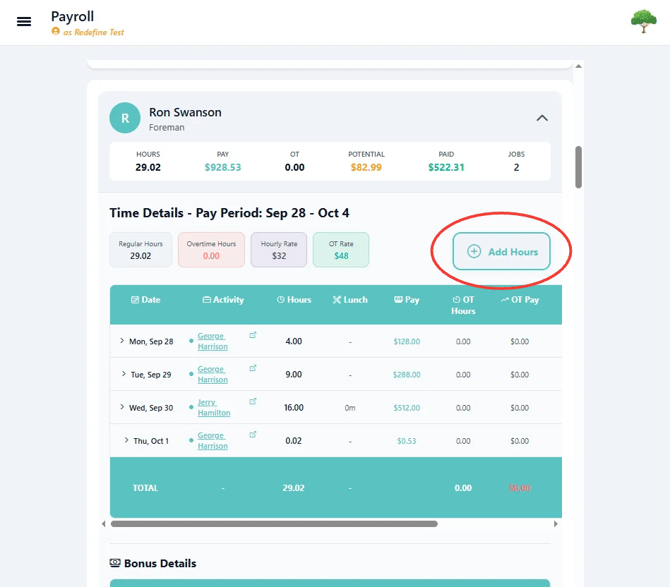
8. Search for the employee by name, filter, or scroll until finding the employee you wish to add hours to. Select the employee and click the "Add Hours" button.
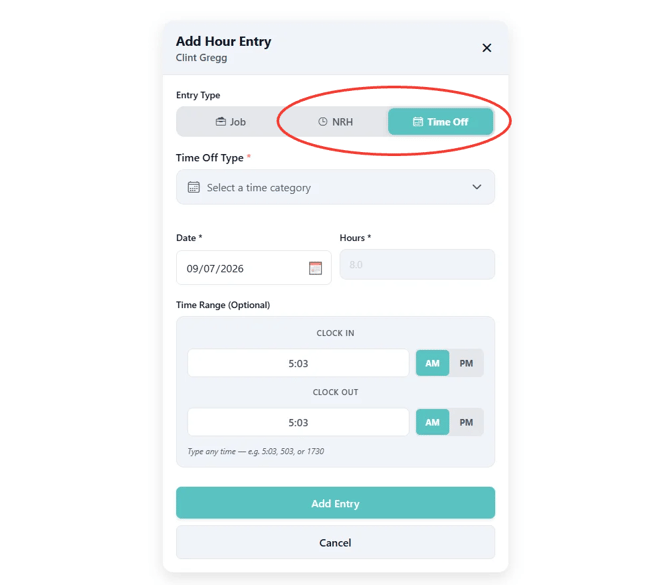
9. Choose between NRH and Time Off. Select the correct category from the drop down under "Time Off Type". Fill out date and time range and click "Add Entry" to finish.
Issues?
-
Not understanding how to create and apply Non-Revenue Hours? Something may be wrong. Submit a ticket here or book support meeting.
- Is this article out of date? Submit a ticket to tell us.